Tiramisu Swiss Roll

Swiss rolls or Yule logs are a Christmas classic, perhaps because the log shape reminds us of in the olden days when the tradition of burning a log in an evergreen forest and dancing along as a celebration of the end of harvest was still around.
This year, I decided to bring a classic Italian twist to the classic Swiss roll by making a delicious tiramisu Swiss roll that’ll be loaded up with all of the holiday goodness that we all love.
The plan is to make a vanilla-espresso sponge cake, I think it’s a kind of cake known as genoise but who has the time for fancy terms? Anyway, I’ll soak the cake with an espresso syrup as tiramisu is made by soaking ladyfingers in espresso, roll the cake up with a simple whipped mascarpone filling and top it with a decadent chocolate glaze.
It’ll be fun, it’ll be festive, and above all it will be delicious.
Serves 10-12
For the Vanilla-espresso Sponge Cake:
4 eggs, separated
3/4 cup sugar, divided
4 tbsp unsalted butter, melted and cooled, plus more for greasing
1/4 cup buttermilk
1 1/2 tsp vanilla bean paste
1 cup cake flour or all purpose flour
1 teaspoon baking powder
2 tsp instant espresso powder
1/2 tsp salt
1/4 tsp baking soda
2 tbsp powdered sugar, for dusting
For the Espresso Syrup:
1/2 cup sugar
1/4 cup water
2 tsp instant espresso powder
1/4 cup espresso liquor (optional. If not, swap for another 1/4 cup water)
For the Filling:
1 container (8oz) mascarpone cheese at room temp
3/4 cup powdered sugar
1 cup heavy cream
1 tsp vanilla extract
For the Chocolate Glaze:
1/2 cup heavy cream
a 4oz bittersweet chocolate bar, chopped into small pieces
1 tsp light corn syrup (optional)
Cocoa powder, for dusting
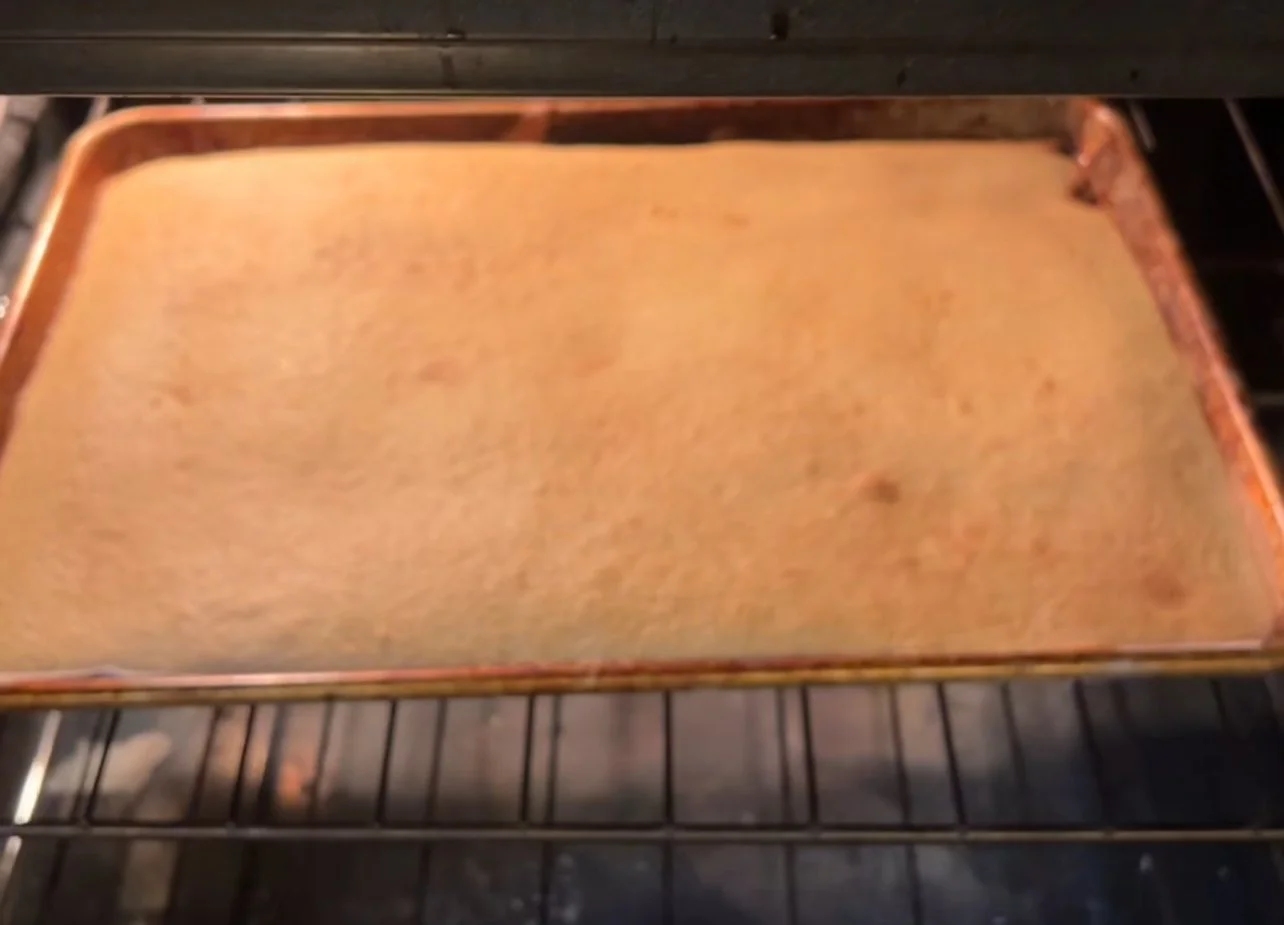
Make the cake. First, preheat the oven to 400 degrees F/200 C. Grease a large, rimmed baking sheet with butter, line with parchment paper, and grease the parchment with butter.
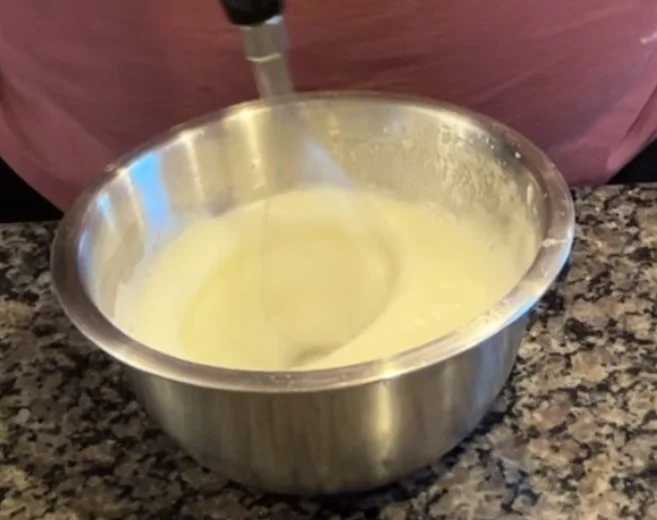
Place the egg whites into a medium bowl and use an electric whisk to beat them until they start getting foamy. Slowly add 1/4 cup of sugar, then keep whisking until they reach stiff peaks. Set aside.
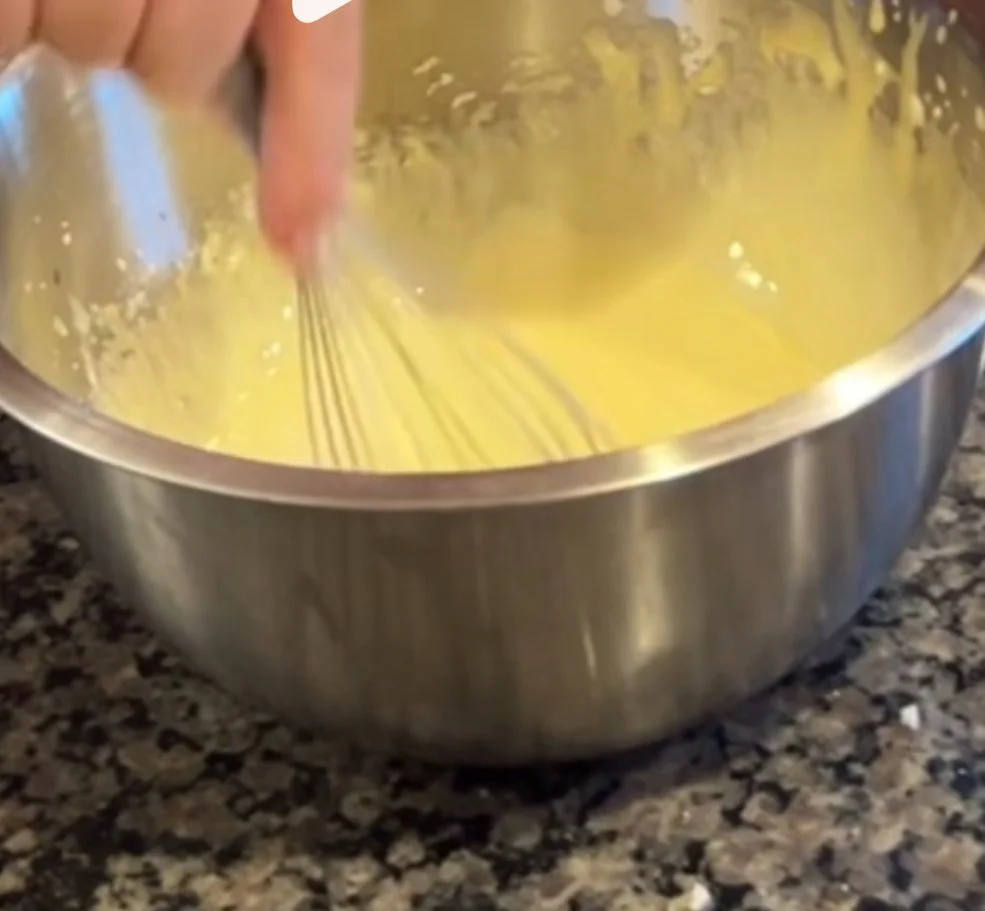
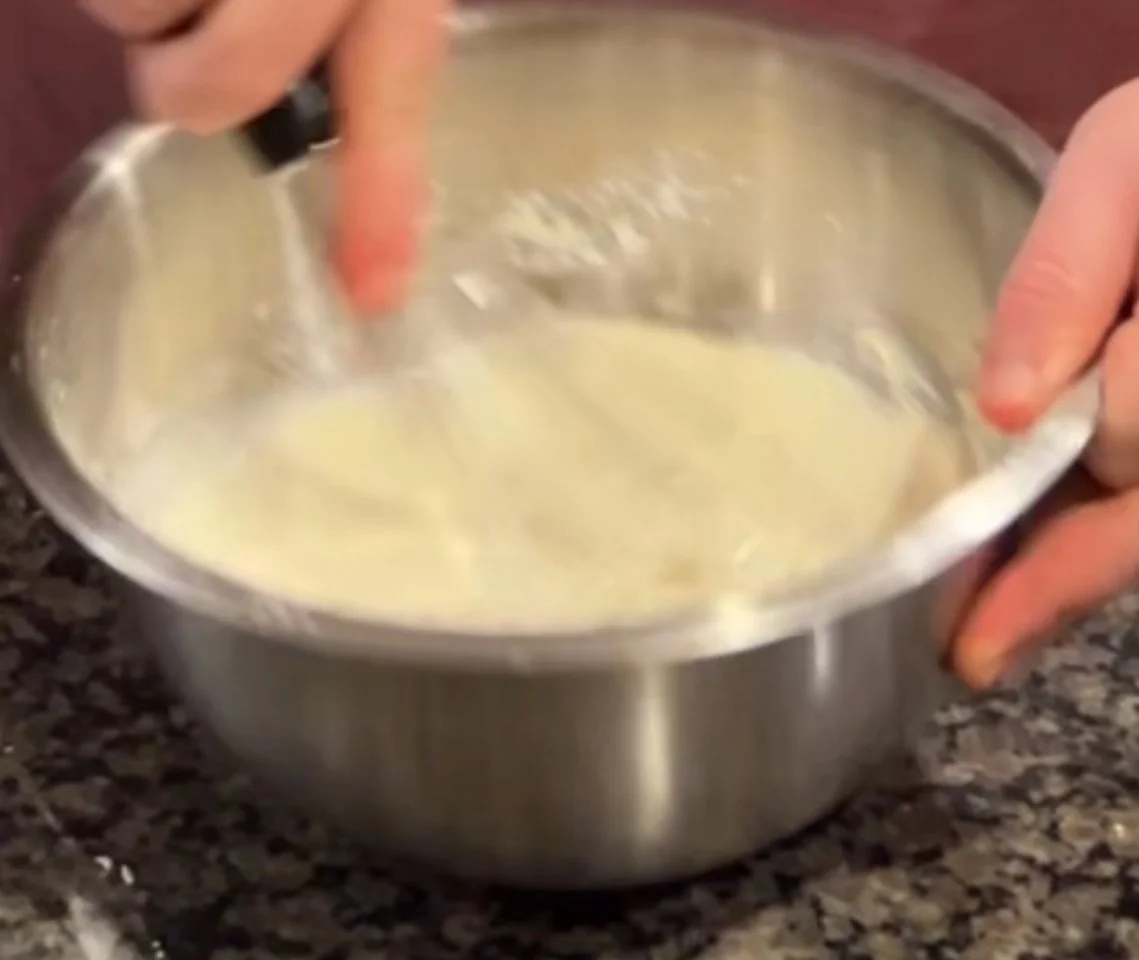
In a large bowl used for the egg whites, beat the egg yolks and remaining 1/2 cup of sugar with the electric whisk for about 3 minutes, or until they turn pale and thick. Slowly drizzle in the melted butter to emulsify, then whisk in the buttermilk and vanilla paste. Sift the flour, espresso powder, baking powder, baking soda and salt into the egg yolk mixture and use a spatula to stir until combined.
Add about 1/3 of the whipped egg whites to the yolks and stir it to combine, then add the remaining whites and gently fold until a smooth batter forms and you no longer see streaks of egg white. Pour and spread the batter onto the prepared sheet pan then bake for 8-10 minutes, or until golden and just dry when you touch it, be careful not to overbake it.
Also, make sure to have a clean kitchen towel standing by, ideally not a cotton towel.
While the cake bakes, make the espresso syrup by combining the sugar, water, espresso liquor (if using), and espresso powder in a small microwave safe bowl. Microwave for 1 minute, then use a spoon or small whisk to stir it until the sugar dissolves. Put it in the fridge until the cake is done baking.
As soon as the cake comes out of the oven, brush it with half of the espresso syrup. Dust the top with powdered sugar and use a paring knife to release it from the edges of the pan. Lay the towel on top, then quickly but carefully invert the sheet pan onto the towel. Remove the sheet pan and parchment paper, then brush on the remaining espresso syrup.
Starting with one of the shorter ends, use the towel to roll up the cake into a log. Allow the cake to cool at room temperature for at least 3 hours.
(You may be tempted to cool the cake in the fridge, but then you’d run the risk of the cake cracking and tearing, so it’s best to leave it to cool on the counter)
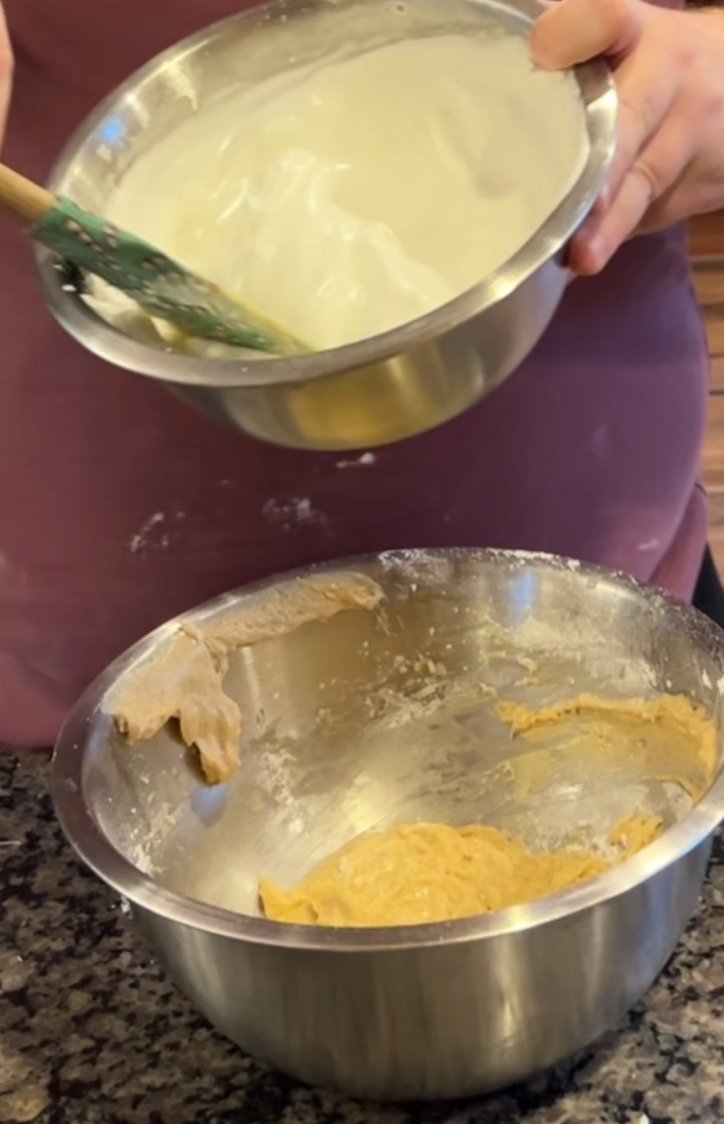
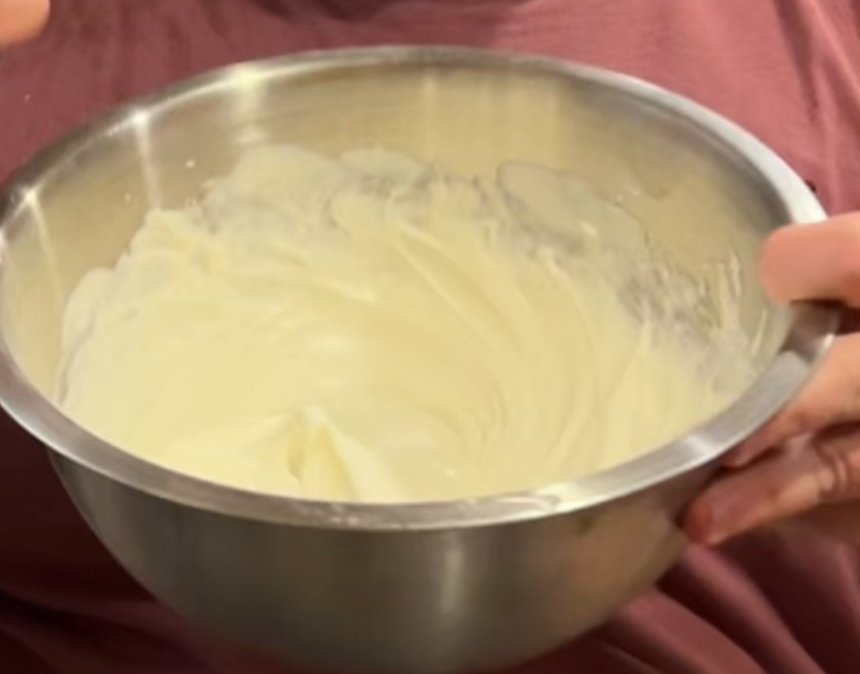
To make the filling, Place the mascarpone cheese and powdered sugar into a large bowl then whisk until just combined. Add the heavy cream and vanilla then continue whipping until it it forms stiff peaks. Set aside in the fridge until you’re ready to fill.
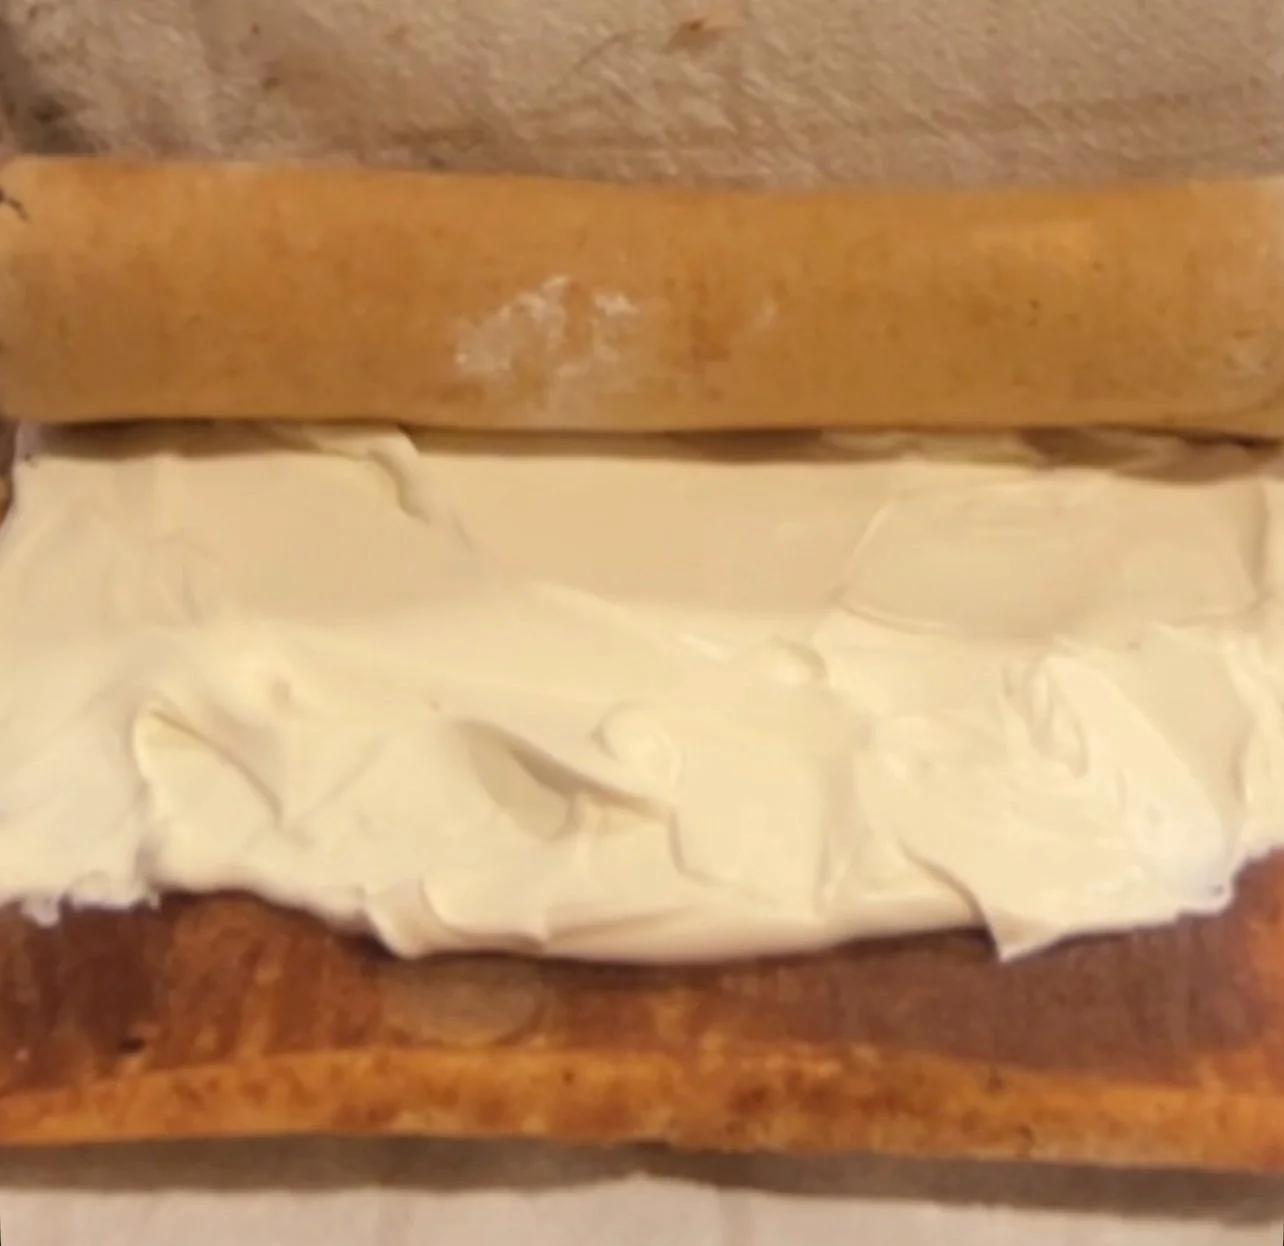
When the cake is completely cooled, unroll it from the towel. Spread on the filling into an even layer, making sure to leave a 1-inch border along one of the shorter ends. Slowly roll the cake back up the same way you rolled it earlier and use the towel to help you get a nice, tight log.
Unwrap the cake log from the towel and place onto a wire rack sitting on a sheet pan.
(Still have a few cracks on the cake despite your best efforts? Don’t worry, that’s what the glaze is for)
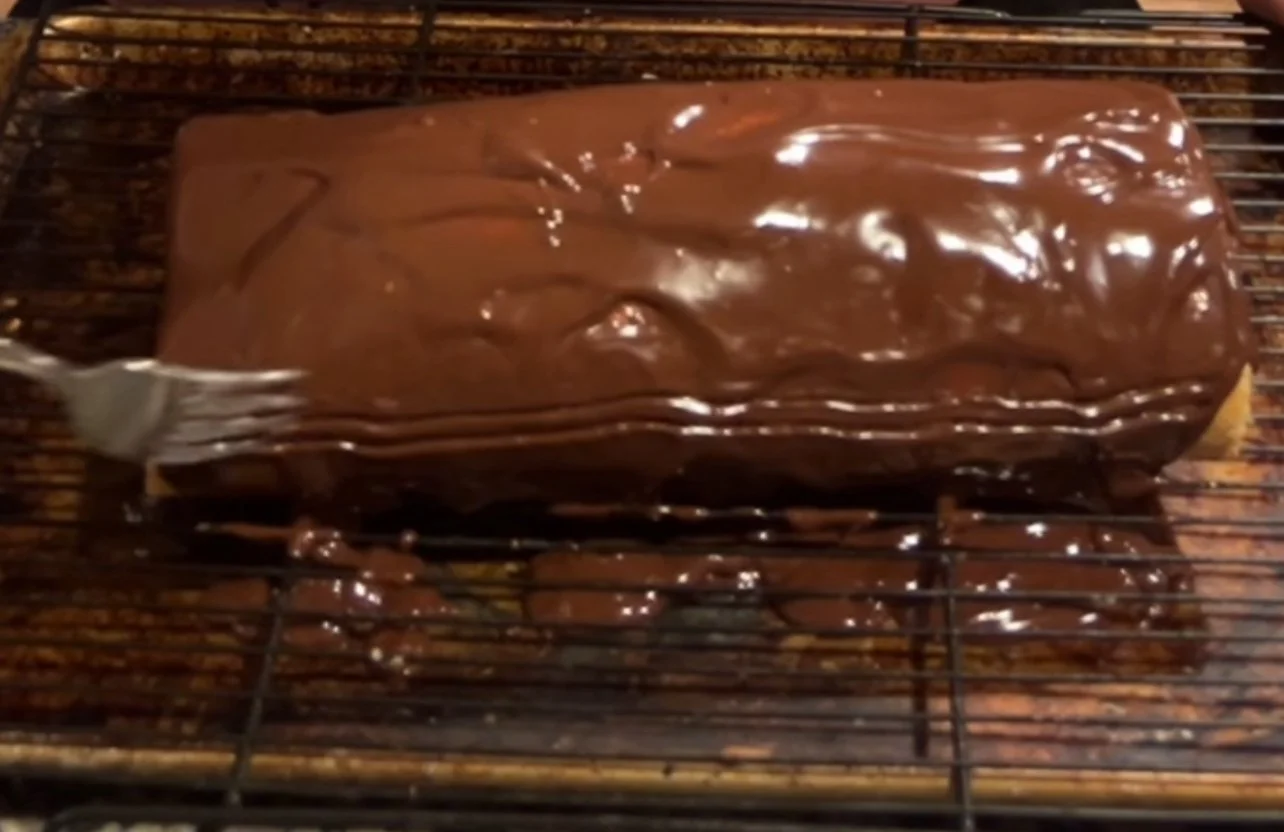
To make the chocolate glaze, heat the heavy cream in the microwave for about a minute, or until hot but not boiling. Meanwhile, place the chocolate and corn syrup (if using) into a small heatproof bowl. Once the cream is hot, pour over the chocolate and leave it alone for about 3 minutes, then use a spoon to stir the mixture until it becomes smooth.
Immediately pour the glaze all over the cake, using an offset spatula to spread it into an even layer, and while the glaze is still warm, dust the entire cake with cocoa powder and transfer to the fridge to allow the glaze to set. Once set, you are ready to slice the cake and serve it to your holiday guests!