
How to Cook Your Steak.
Nothing says meat indulgence more than steak (Lobster as well, but that’s another article). Having a tender, juicy piece of steak can set the tone for any night’s dinner and make you feel like a millionaire.

While you could easily spend dozens, sometimes hundreds, of dollars at a steakhouse, knowing how to cook a steak perfectly at home is a great way to impress your family, your date, and your friends. Since steaks tend to be expensive, you should know how to cook them right.
Today, I will walk you through the steps to help you cook a juicy piece of meat at home.
If you like this article and anything else you see on this blog, then please show your support by subscribing to my Food Loving Members page.
It only costs $5/month, and a portion of that will be donated to help combat climate change, so what are you waiting for? Subscribe!
Ok, let’s talk about the perfect steak.
How rare or done you want your steak is a matter of preference and diet, but for the most part we want a steak that is tender, juicy, melts in our mouth like butter and has a beautiful dark crust.
With the method I’m about to share, your steak will check all of those boxes and more.
First things first, what kind of steak will we be working with?
There are many varieties of steak that range in texture, flavor, marbling, and price; ranging from cheaper cuts like skirt steak to high-end cuts like filet.
Today, I will be working with a boneless strip loin, also known as the New York strip. The strip comes from the short loin section, or lower back section, of a cow; it has a good amount of flavor, a low fat content, and is very tender.

By the way, if you’ve ever seen a porterhouse or T-bone steak, that is a strip steak and a chunk of filet held together by a T-shaped bone.
When you buy steak, your best bet is your grocery store’s meat counter, as they often put out the freshest, best-looking cuts of steak that you can choose from. (Plus, if you get to know who’s working back there, you might find yourself getting a few discounts.)
An hour before you start cooking your steak, it is important to take it out of the fridge and let it come up to room temperature. By cooking a warmer steak, it will cook evenly and come out more tender.
When you’re ready to get cooking, you’ll want to start by patting your steak dry with paper towels, doing so will remove any surface moisture on the steak to allow any salt or seasoning to stick to it better.

Speaking of which, another thing you can do in advance is salt your steak as the salt will pull out the moisture inside the steak and ensure a dark, mahogany crust.
I salted my steak about 6 hours before I wanted to cook it, but you could do it a day in advance. If you are going to do this, I would suggest that you let the steak sit in the refrigerator and pull it out about 10 minutes before cooking.

When we season a steak, or any kind of meat or fish for that matter, we want to do it by sprinkling salt from a few inches above the steak as that will allow the salt to distribute evenly across the steak and season it evenly.
In the image below, you’ll see two patches of salt: one that was sprinkled at a height and one that was sprinkled on a close-up. Both patches used the same amount of salt, but you can definitely see the difference.
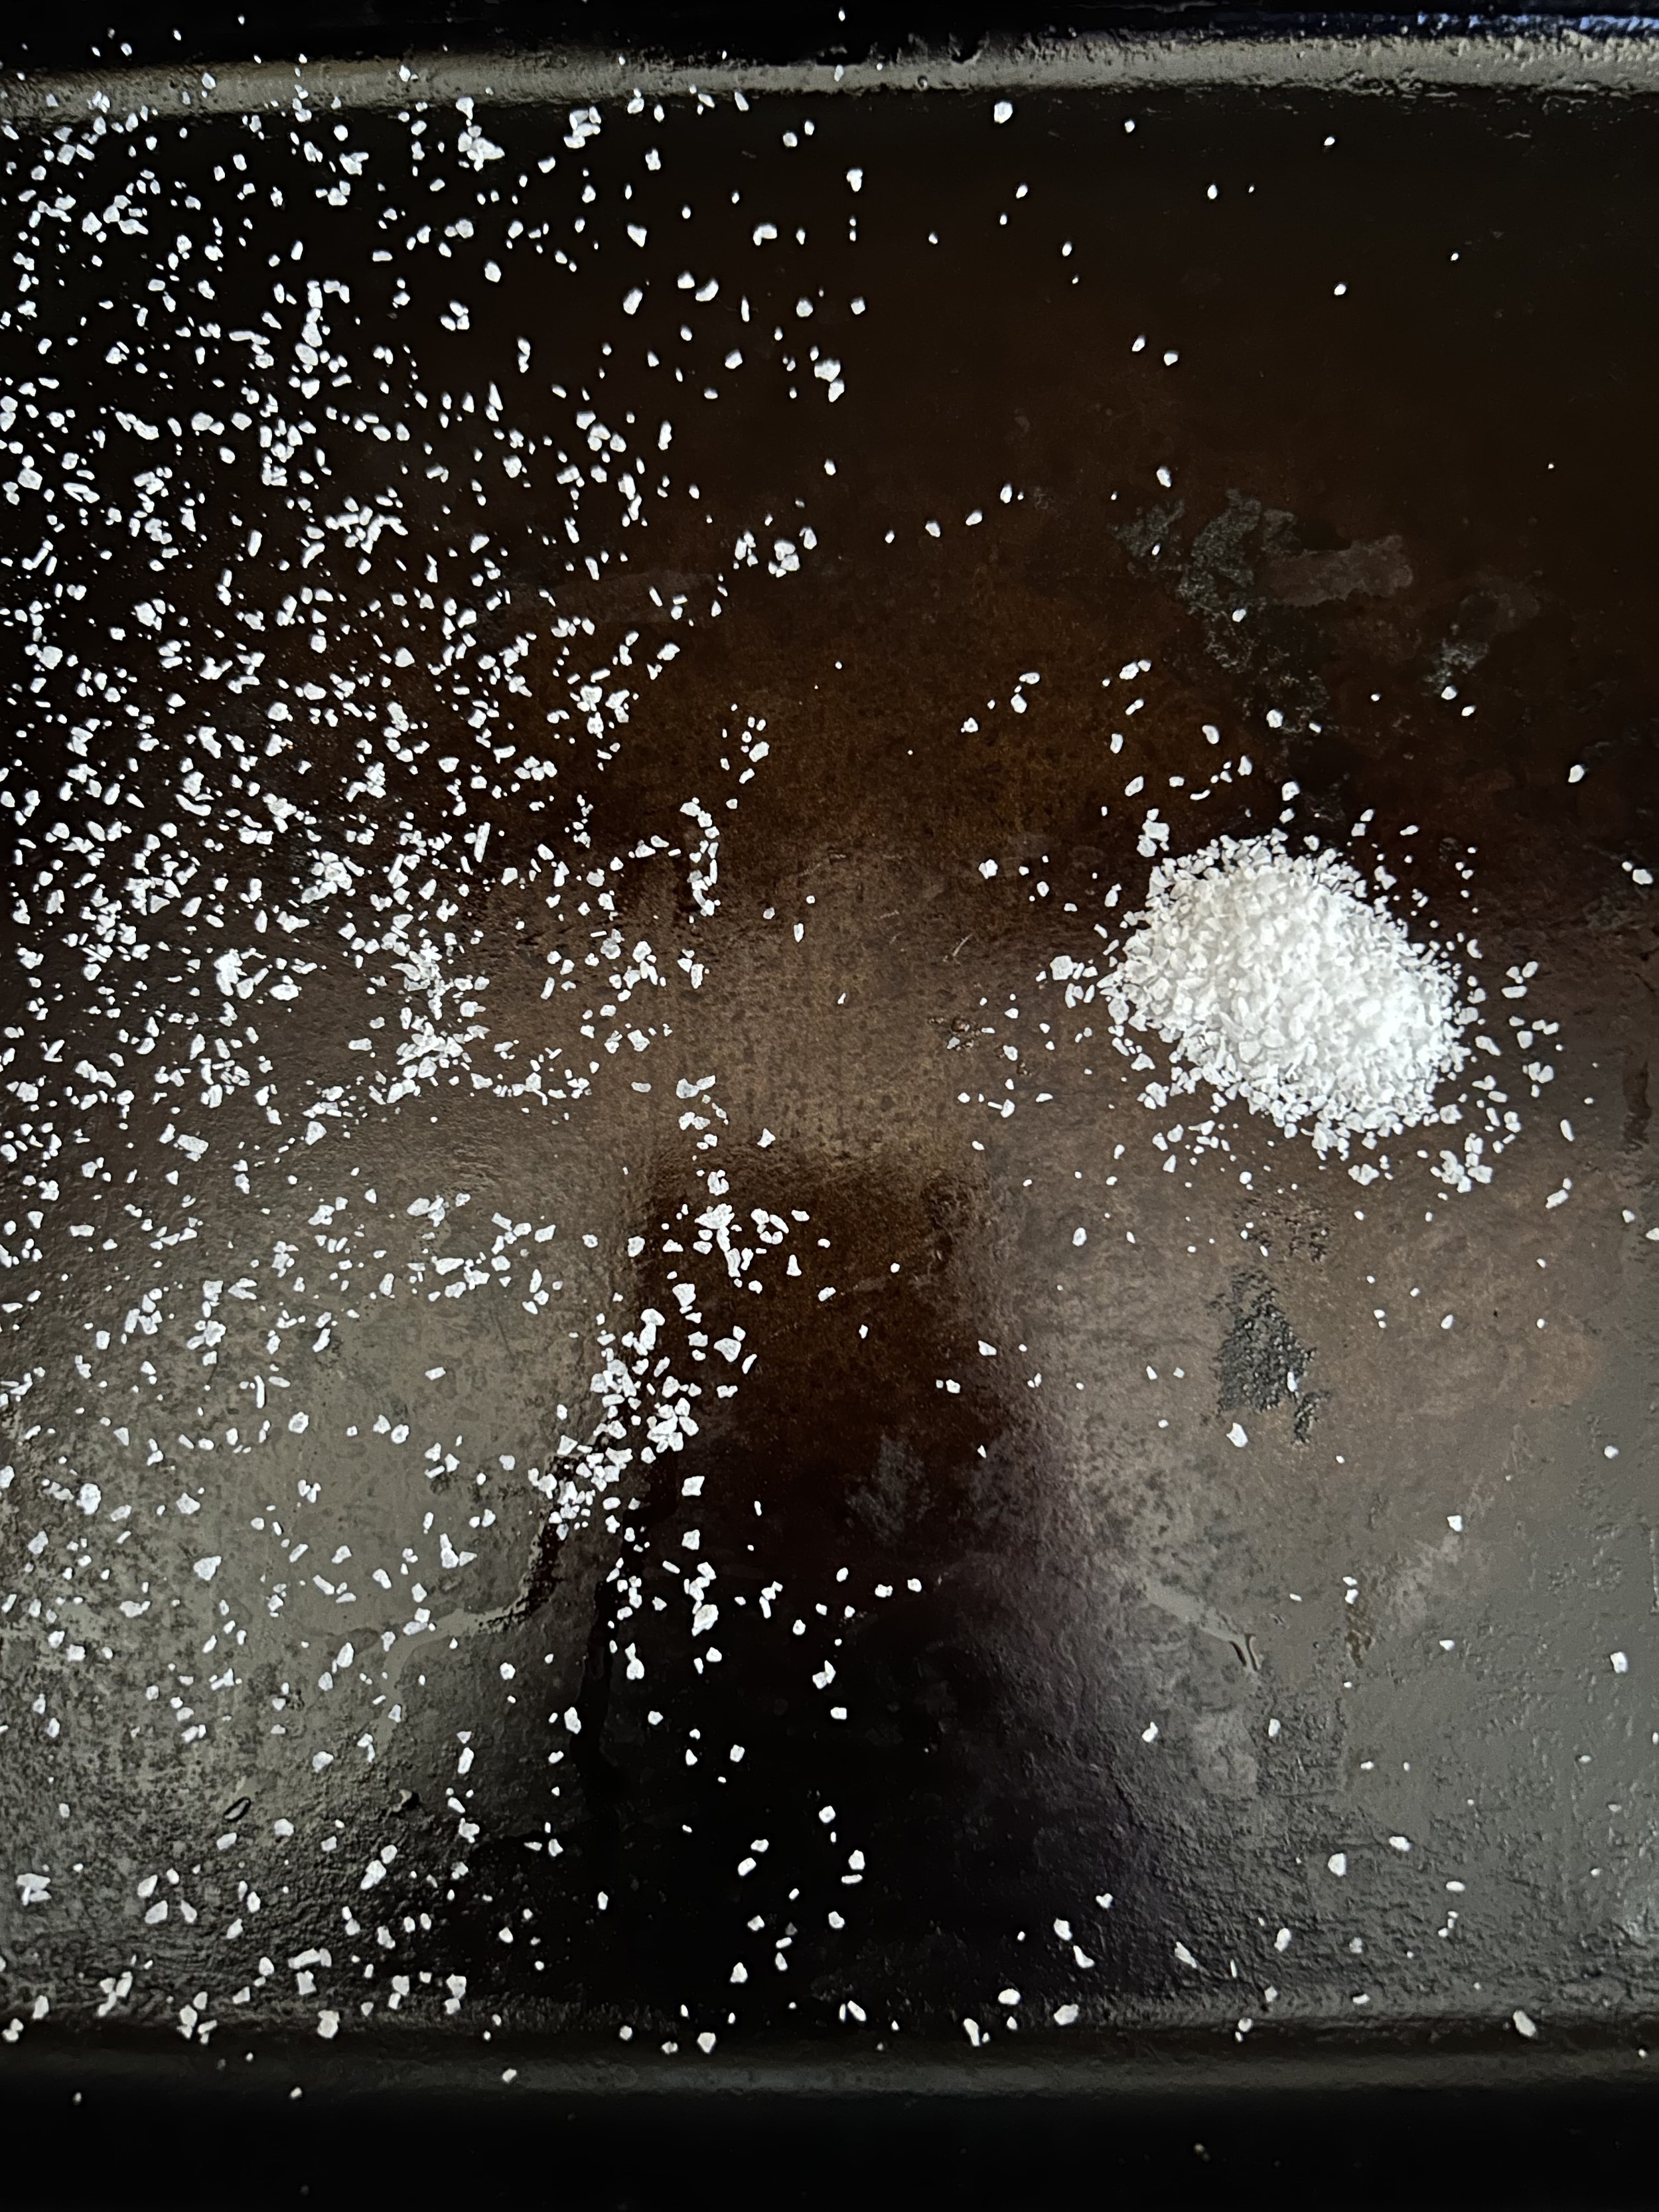
Notice how on the left side the salt has sprinkled throughout the tray like snowfall while the one on the right has packed into a dot? Imagine if that was on your steak. What you would end up with is a few bites of steak that are inedibly salty while the rest has no seasoning whatsoever.
I also like to sprinkle a bit of garlic powder and coarse-ground black pepper onto my steak, but that’s a taste preference. Whatever spices or seasoning you like to put on your steak is fine by me, but I do prefer garlic powder over fresh garlic as the fresh stuff can burn while the steak is cooking.

You may also notice that I did not trim off the fat from the steak, that is intentional. So here is the big secret, folks: Fat=flavor. Cut off the fat, and you lose the flavor.
Now, let’s get cooking. Steak is one of those things where you can ask 50 chefs how to cook it and you will likely get 50 different answers.
The way I will be doing it is a method known as the reverse-sear method, I’ll be slowly cooking my steak in a low oven to get it close to the desired temperature before blasting it in a hot skillet to get that sear.
To do this, I will start by placing my steak on a wire rack on top of a baking sheet. I’m using the wire rack to help circulate the heat from the oven around the steak and allow it to cook evenly.

To ensure my steak gets cooked perfectly in the oven, I like using the Meater Plus Bluetooth meat thermometer (not a sponsor) that connects to an app on my phone to tell me exactly how long my steak will need to get to the temperature I desire.
For medium-rare, I recommend cooking for about 25 minutes in a 250-degree oven, or until the internal temperature is between 110-115 degrees, but if you like it more well done (I like it medium), then you can certainly leave it in there a few minutes longer.
110-115 degrees is not the minimum internal temperature range for medium-rare, but this is fine because the steak will continue to cook once I sear it in a pan.
While the steak is cooking, let’s talk about meat doneness. Or, to be more technical, meat temperatures.
Everyone has their preference on how they like their meat cooked, but it seems that there are a good handful who don’t understand what the terms for those temperatures mean, so here is a helpful guide to what the different temperatures are and what they mean.
Rare (120-125): Seared on the outside, but very red in the center
Medium-rare (125-130): warm center that’s slightly pink, but still quite red. It’s what chefs and foodies love.
Medium (130-135): Pink all around, not much trace of redness
Medium-Well (135-140): Still slightly pink, but leaning towards the grey side.
Well done (145+): No pink, whatsoever.
Also, some people seem to think there is such a thing as pluses; medium plus, mid-rare plus, etc. There is no such thing as pluses, it’s either rare, mid-rare, medium, mid-well or well, that’s it!
Memo done, let’s get back to our steak.
Once the steak has reached the desired internal temperature, you’ll want to take it out and start heating up a large cast iron skillet over high heat. You do want to get this pan as hot as possible, as the goal is to sear the steak without cooking it much further.

I’ll admit, the steak doesn’t look very attractive at this point, but once we get it seared it will look 10x better.
As the skillet gets hot, drizzle in enough vegetable oil to coat. You want to use something other than olive oil for this, as it has too low of a smoke point and will burn much quicker.
If you want to, you can add some sprigs of thyme, rosemary, whole garlic cloves to your skillet as it’s heating up and let that infuse into your oil to give extra flavor to the steak.

Once you can start to see whiffs of smoke coming off of the pan, add the steak and cook for 1-2 minutes on each side, or until you are happy with the sear. (I would suggest turning on your kitchen’s vent fan at this point, as things will get smoky.)

I wish you could smell the contents of this skillet!
The beauty of the reverse-sear method is that, once your steak is seared, you do not need to rest it before cutting into it and eating it!
Normally, when cooking meat, you want to let it rest for a few minutes after it’s done cooking so the juices can redistribute and the meat will be juicer and more tender.
However, since we allowed the steak to rest in the baking sheet while the cast iron pan was heating, the steak will have already rested by the time it’s seared so the juices will stay locked inside the steak and not end up on your cutting board or plate.
As for serving, there are a lot of ways you can go. You can do potatoes, green beans, asparagus, or a blend of vegetables, but today I will serve it with some air-fried Brussels sprouts. (Some wine would be nice as well)

Also, you could create a pan sauce or herb butter to serve with your steak, but as a former Texan, I do believe that a delicious steak is capable of standing on its own. It’s your call, though.
If I’m feeling fancy, I might sprinkle a bit of flaky sea salt on top of the steak for pops of salty, crunchy texture, but for the most part, I am a steak purist.
With all said and done, you will find yourself digging into a juicy, well-seasoned, perfectly cooked steak that will be so tender that you could practically cut it with your fork, and will be worth every penny.
(Ok, now here’s a simplified recipe.)
Reverse-seared NY steaks
4 strip loin steaks
Kosher salt
Coarse ground black pepper
Garlic powder (or any seasoning that you like.)
Vegetable oil (for searing)
Rosemary sprigs, thyme sprigs, and/or garlic cloves. (Optional but recommended)
Take the steaks out of the refrigerator at least an hour before you are ready to cook them.
Pat them dry with paper towels, then season them with salt and the spices.
Lay onto a wire rack on a sheet pan and bake in a 250 degree oven for 25-30 minutes, or until the internal temperature reaches between 110-115 degrees (For medium-rare).
Once the steaks are ready, heat a large cast iron skillet with a thin layer of oil, the herbs and garlic (if using) over high heat until the skillet starts to smoke.
Sear the steaks for 1-2 minutes on both sides, or until deep brown, and serve!