
Cocoa-Apple Strudel

A while back, I made this crazy-looking pasta dessert called Crescia Sfogliata, which is essentially a pasta version of an apple strudel, and it was good…but I did come across a few flaws with the recipe I used.
The main thing was…the pastry, which was basically a type of pasta dough that was rolled out to a see-through paper-thinness that ended up making it spread across my dining room table and, despite my care, did end up tearing in more than a few places. Also, the apples inside went in raw and, with no real way to soak up any excess moisture, they ended up making the finished pastry so wet that it was hard to eat.
So, here’s what I’m thinking, what if there was a way to do a dessert like this but make it a bit easier and more fool-proof for American home cooks? That is what I’m here to find out.
Here is my thought process, rather than making my own dough, I will instead be using the paper-thin sheets of dough commonly used for baklava and other strudel-like desserts known as Phyllo. Also, rather than using the raw apples, I am going to cook my apples a bit and also get some breadcrumbs involved to soak up any excess moisture, but I will keep with the flavors (including cocoa, citrus, and walnuts) that were used in the original dessert.
Know Your Phyllo
I understand that not everyone is familiar with Phyllo pastry, much less know what to do with it, so here are some helpful tips and knowledge that should help you along the way.
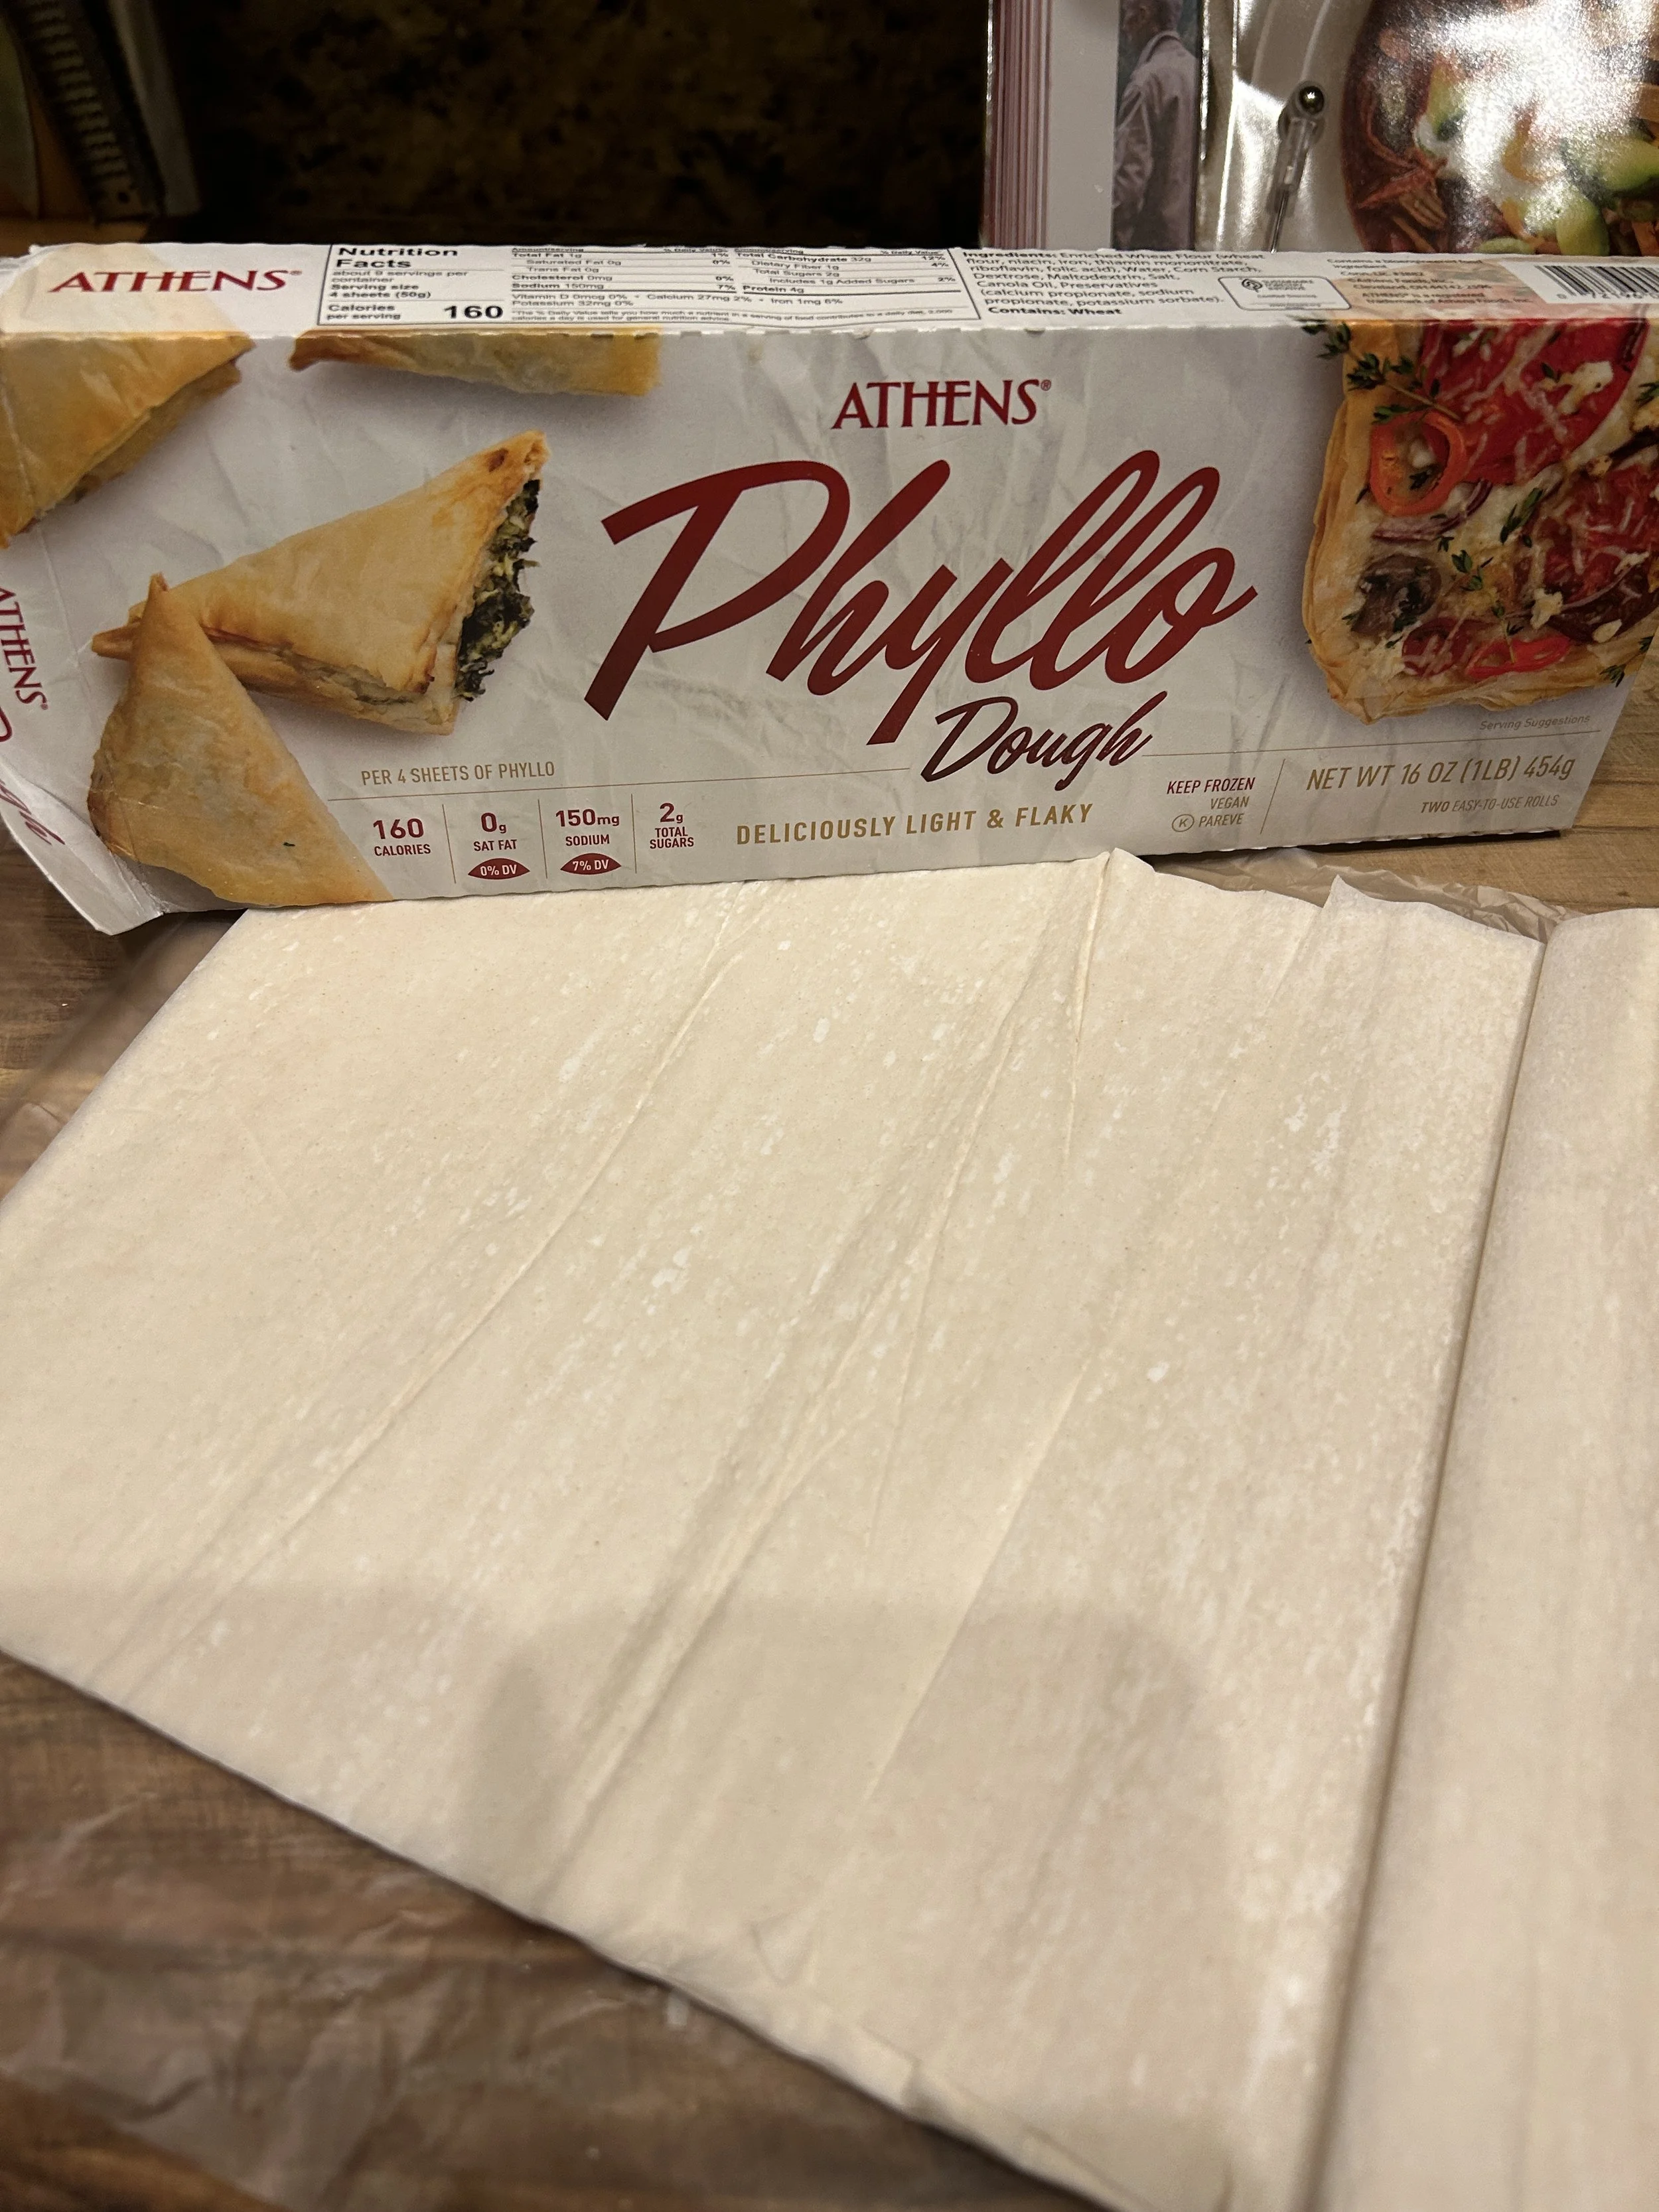
Phyllo involves paper-thin, very delicate sheets of pastry that, when stacked upon one another, create many layers that become crisp and flaky once baked.
If you wanted to attempt to make Phyllo pastry at home, knock yourself out, but it is quite difficult to evenly get those sheets to that ultra-thinness without tearing the pastry, so for home bakers I say that frozen Phyllo dough is your best option. To thaw, simply transfer one roll of pastry sheets to your fridge and let it sit overnight, or if you’re in a rush then you can let it sit on your kitchen counter for about 2 hours.
Because Phyllo pastry is so thin, it can dry out quickly, so make sure you keep any pastry sheets you’re not using wrapped in either the wrapping it came in or a kitchen towel.
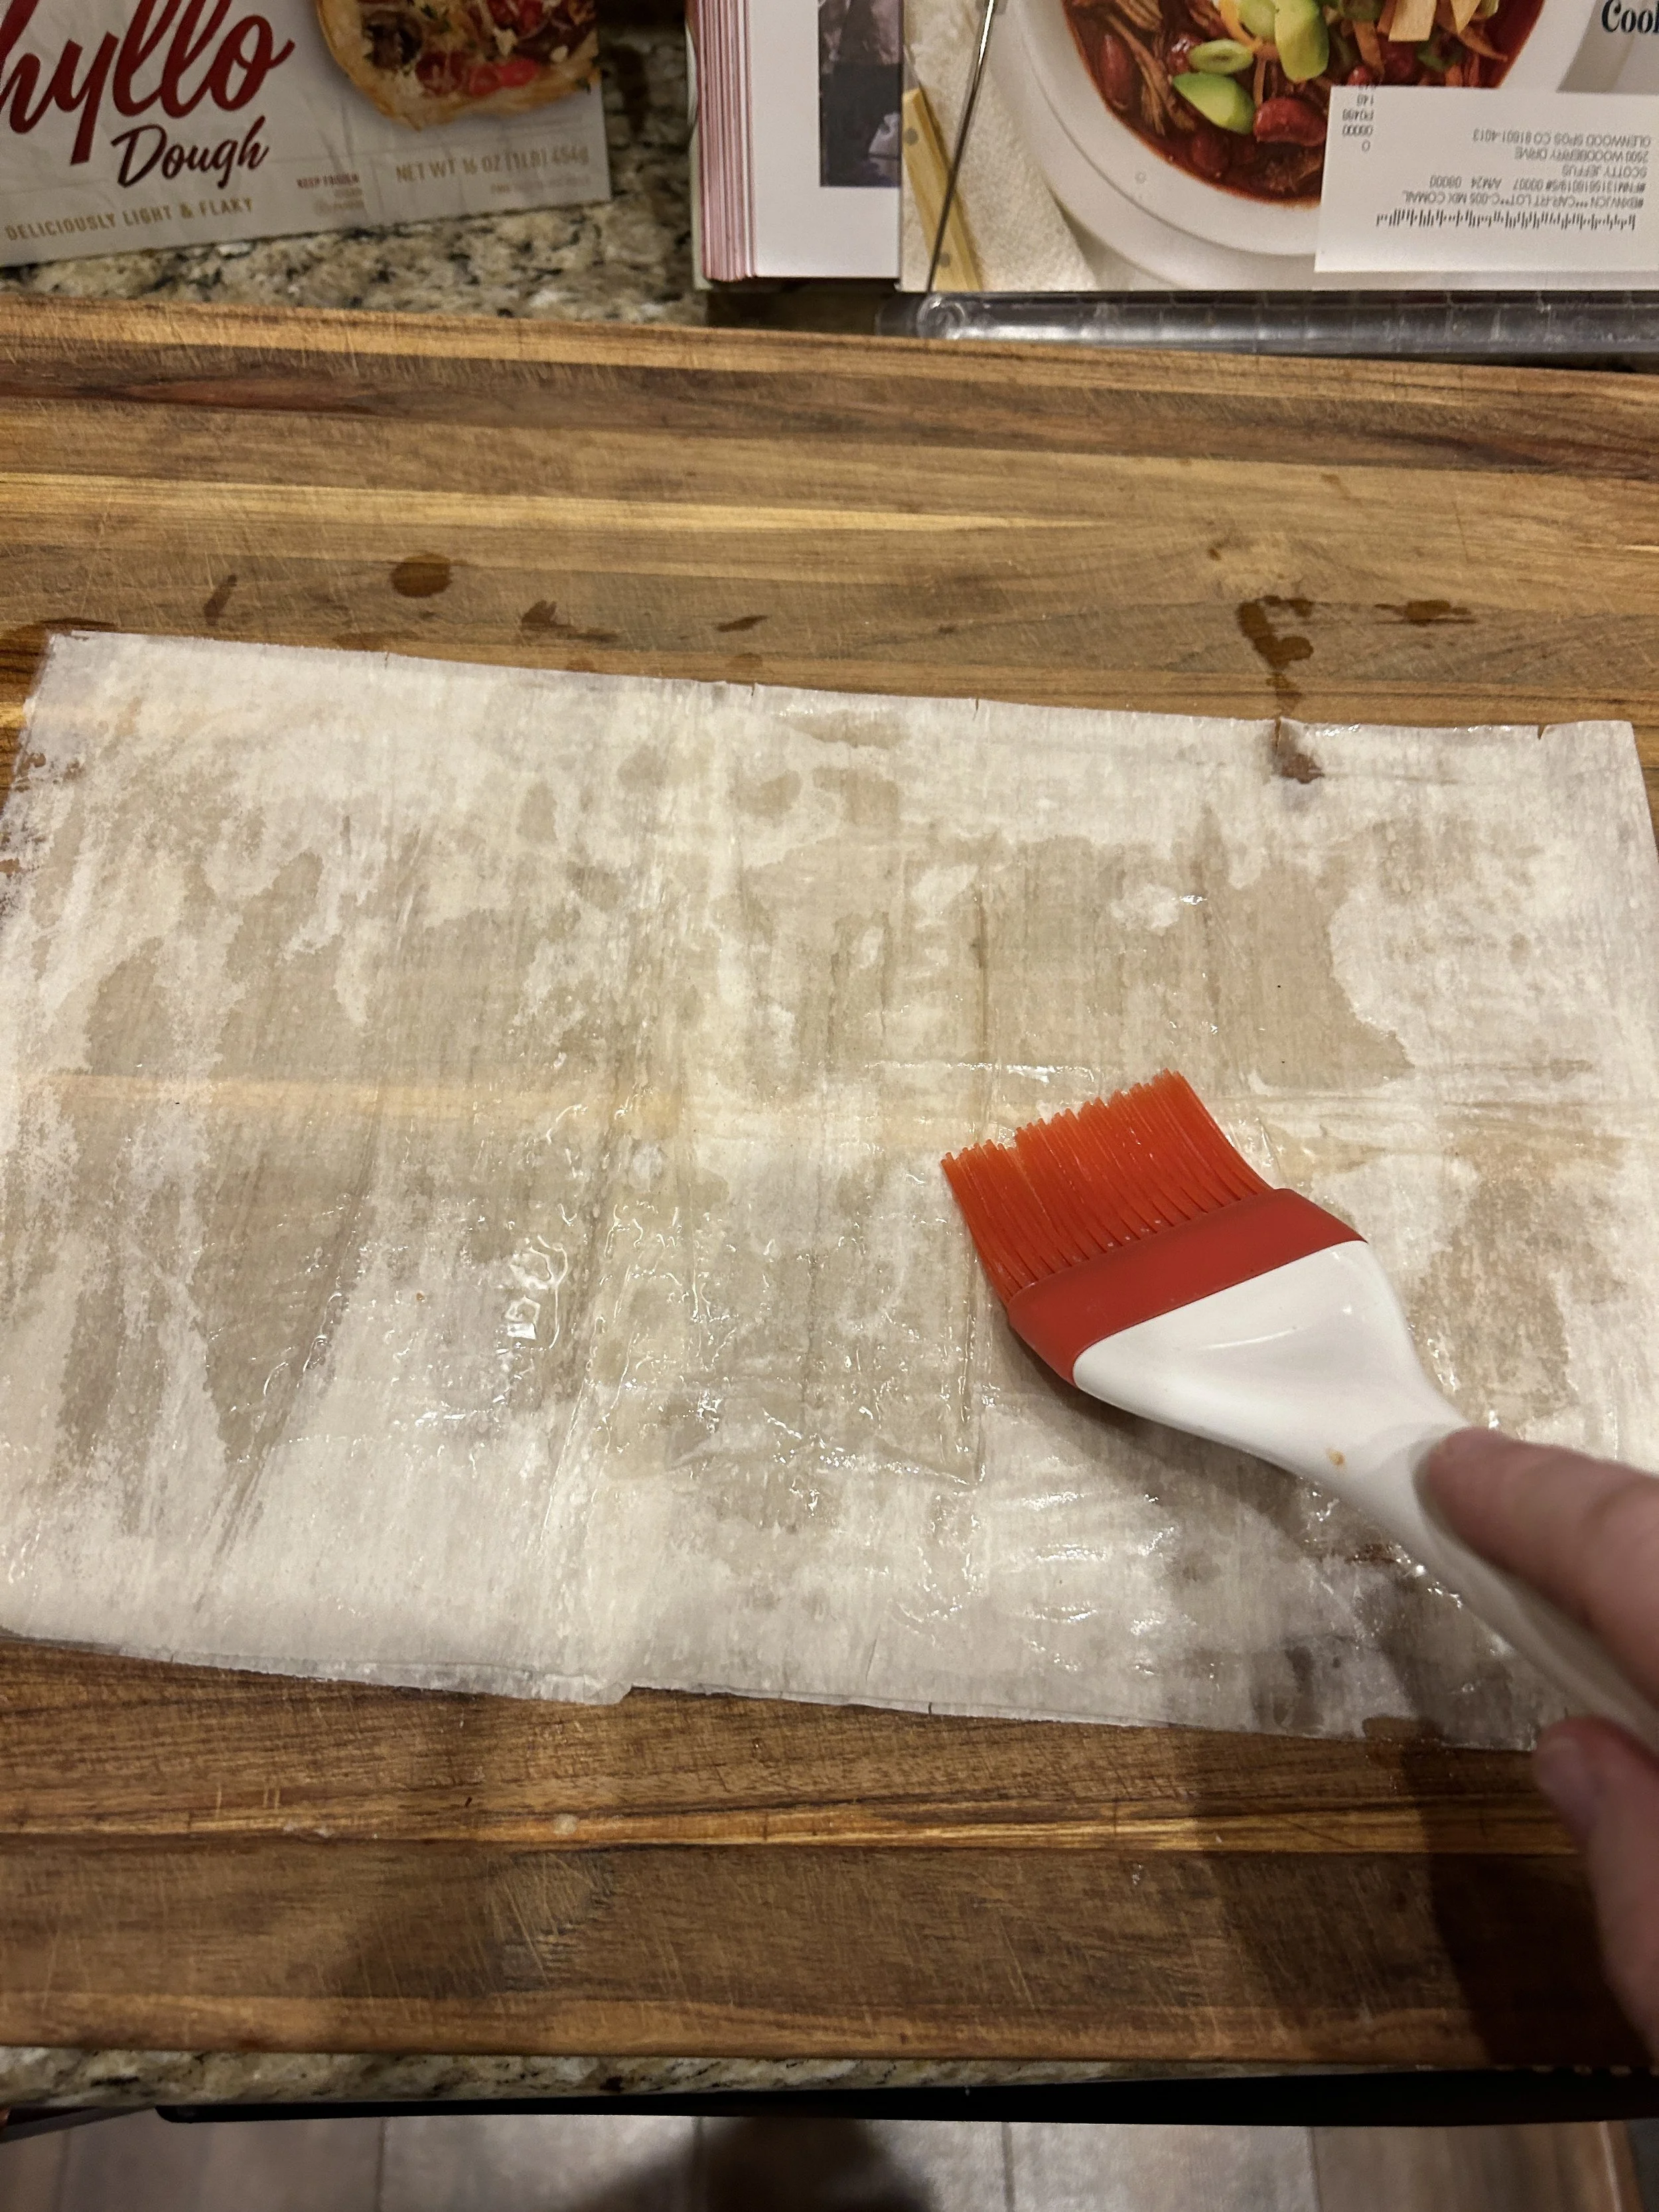
In order to allow the pastry layers to stick together and become nice and crisp, you need to lubricate each and every layer either with melted butter or oil.
It’s likely that one or two of your pastry sheets might tear or get a small hole in the middle. This isn’t too big of an issue; those layers can simply go in the middle, but if the pastry is in shreds, then you’ll want to discard it.
Makes 6 servings
For the Filling:
2 tablespoons of light olive oil
3 cooking apples (such as Fuji, Honeycrisp, or Grannysmith), peeled and shredded
2 tablespoons of sugar
Zest of 1/2 an lemon
Zest of 1/2 an orange
1/2 teaspoon of vanilla extract
A pinch of salt
3/4 cups of chopped walnuts
1/2 cup of sultanas or golden raisins, plumped up in water then drained
1/3 cup of cocoa powder
1/2 tablespoon of anise liquor
For the Pastry:
10 thawed sheets of frozen phyllo pastry
1/2 cup of light olive oil (not extra virgin)
1/4 cup of Panko breadcrumbs
Heat the oil in a large nonstick skillet, combine the apples, sugar, lemon zest, orange zest, and vanilla. Cook the apple mixture over medium-low heat for about 10 minutes, or until the apples have shrunk to about half their volume. (This is an important step because the more moisture you cook out of the apples, the more likely you’ll have a happy, crisp strudel in the end)
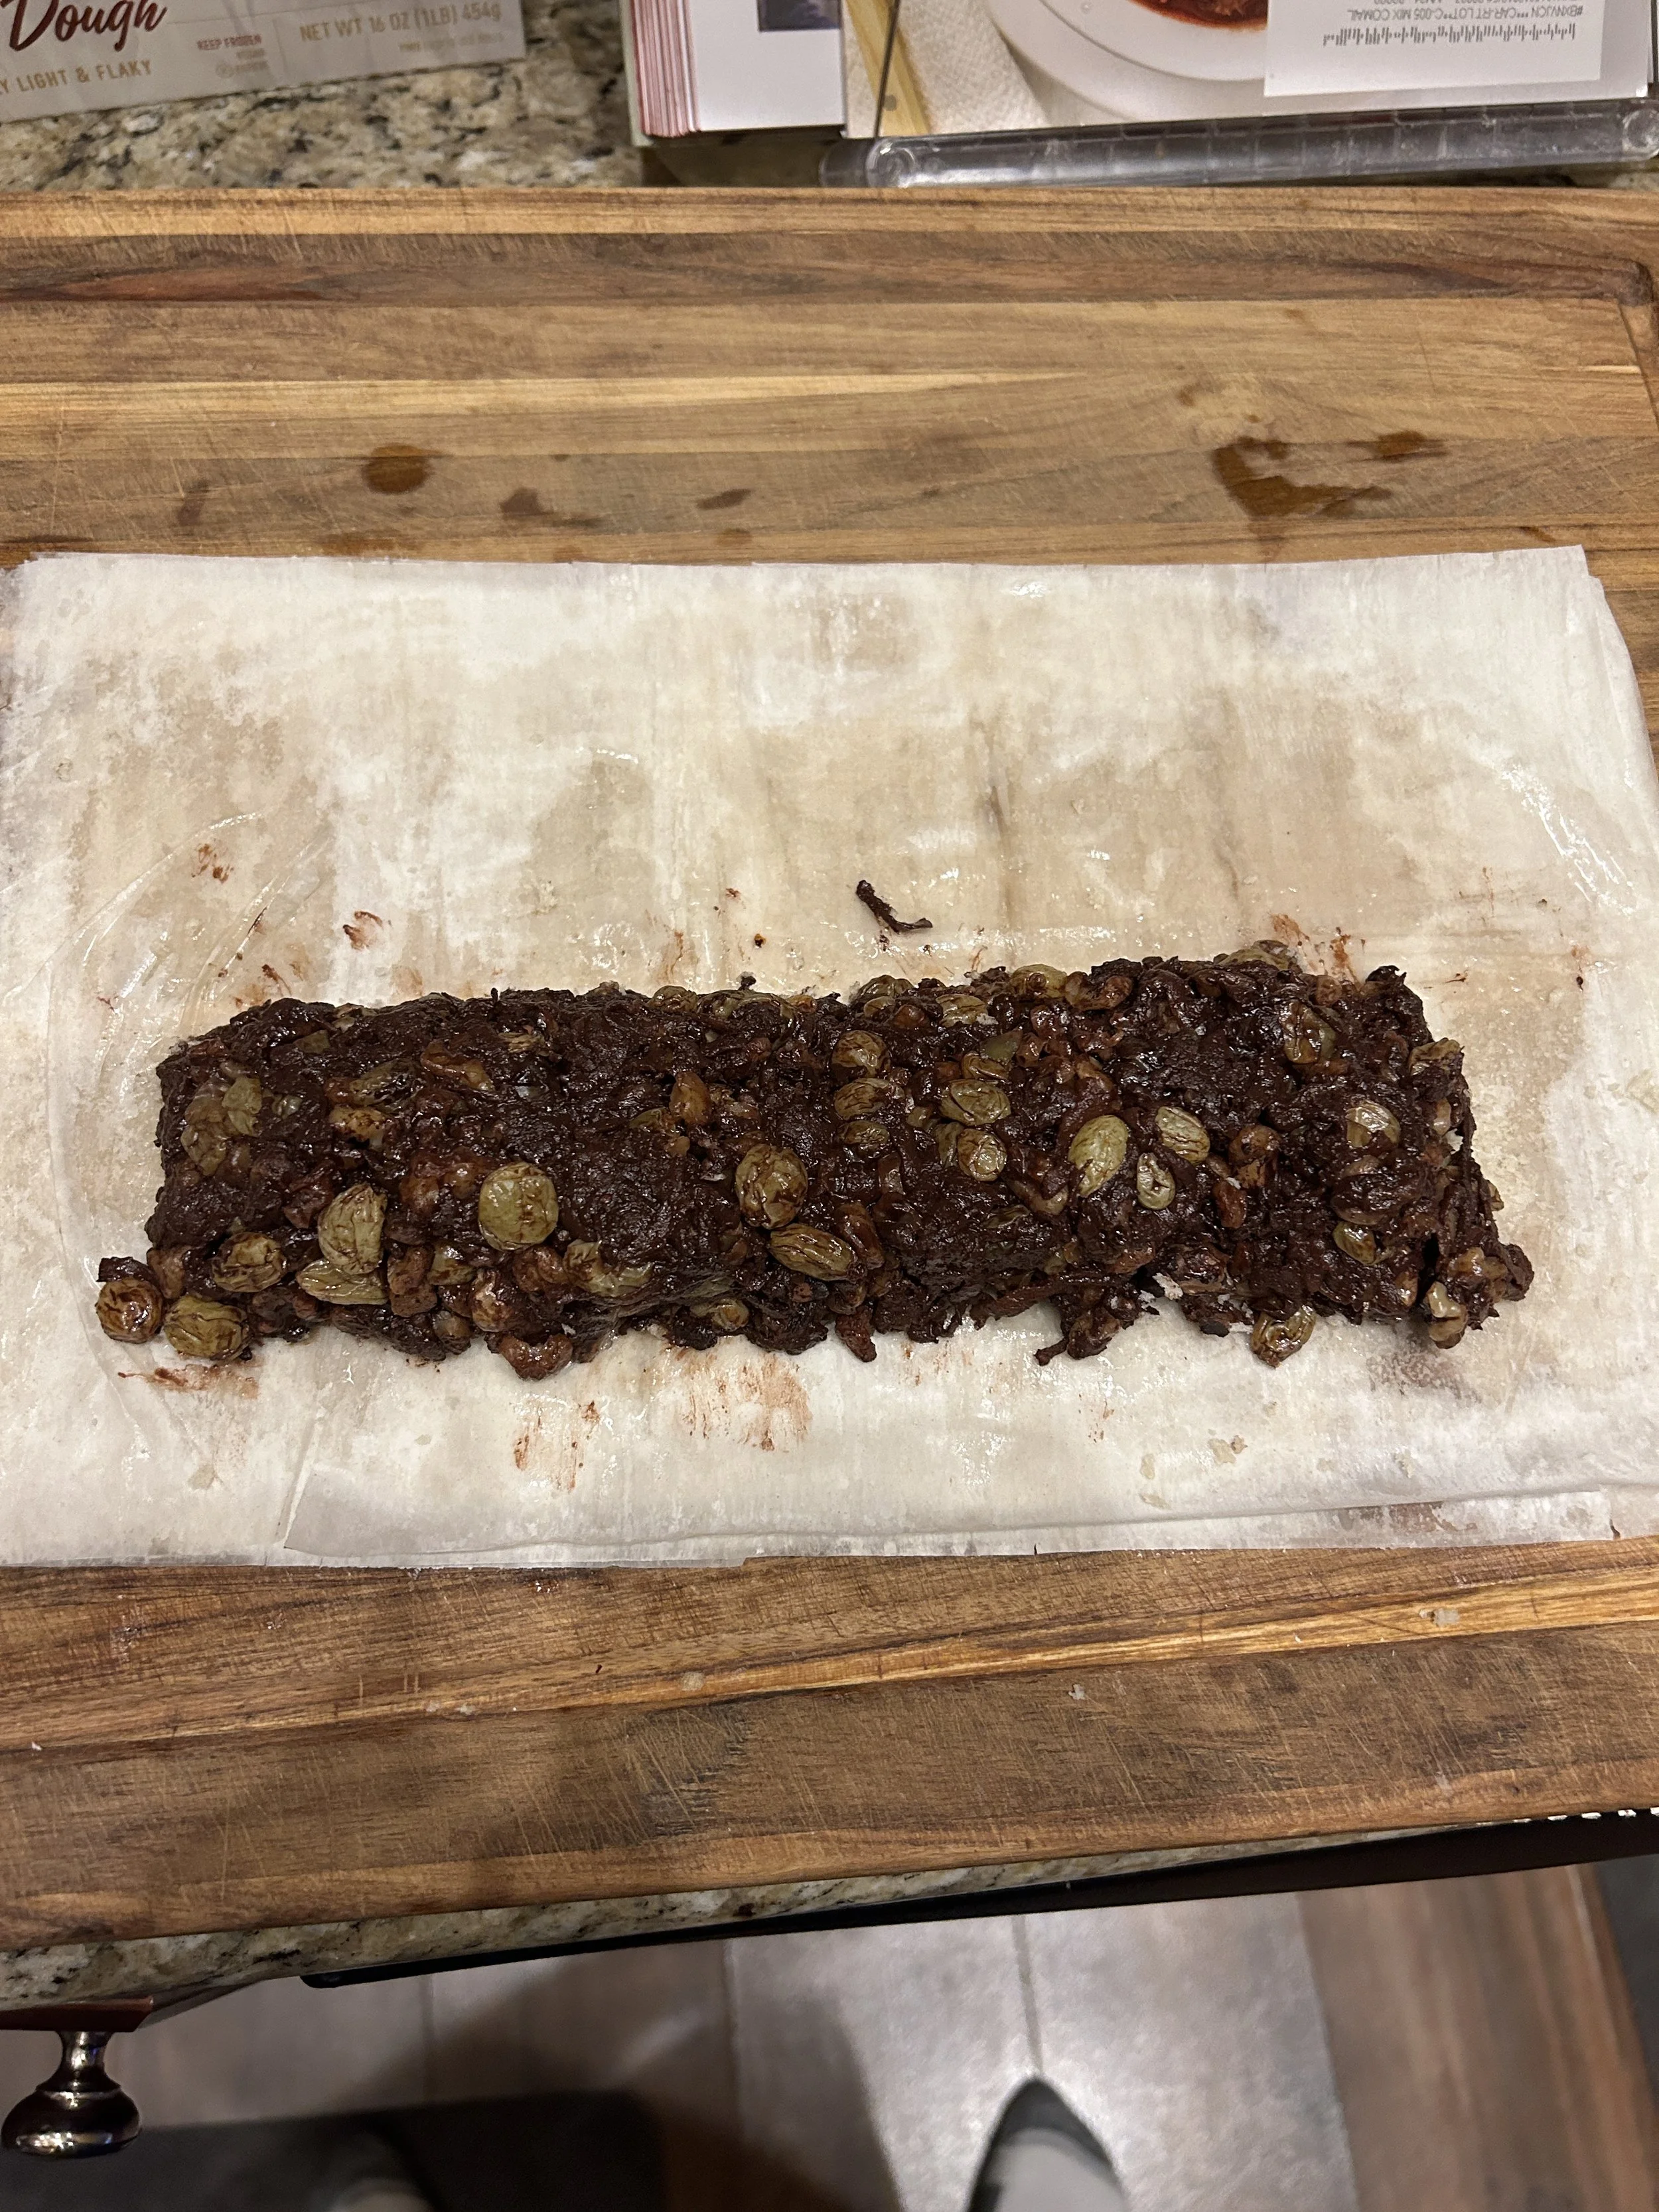
Dump the apples into a bowl then add the cocoa, walnuts, soaked raisins, and anise liquor. Let it cool completely.
Preheat the oven to 350 degrees, make sure there’s a rack in the center of the oven, and line a large baking sheet with parchment or a silicone mat.
Lay one of the thawed phyllo pastry sheets onto a clean workbench. Brush with a thin layer of oil, then lay another sheet on top, ensuring the sides line up evenly. Repeat this 3 more times, until you have 5 layers of pastry.
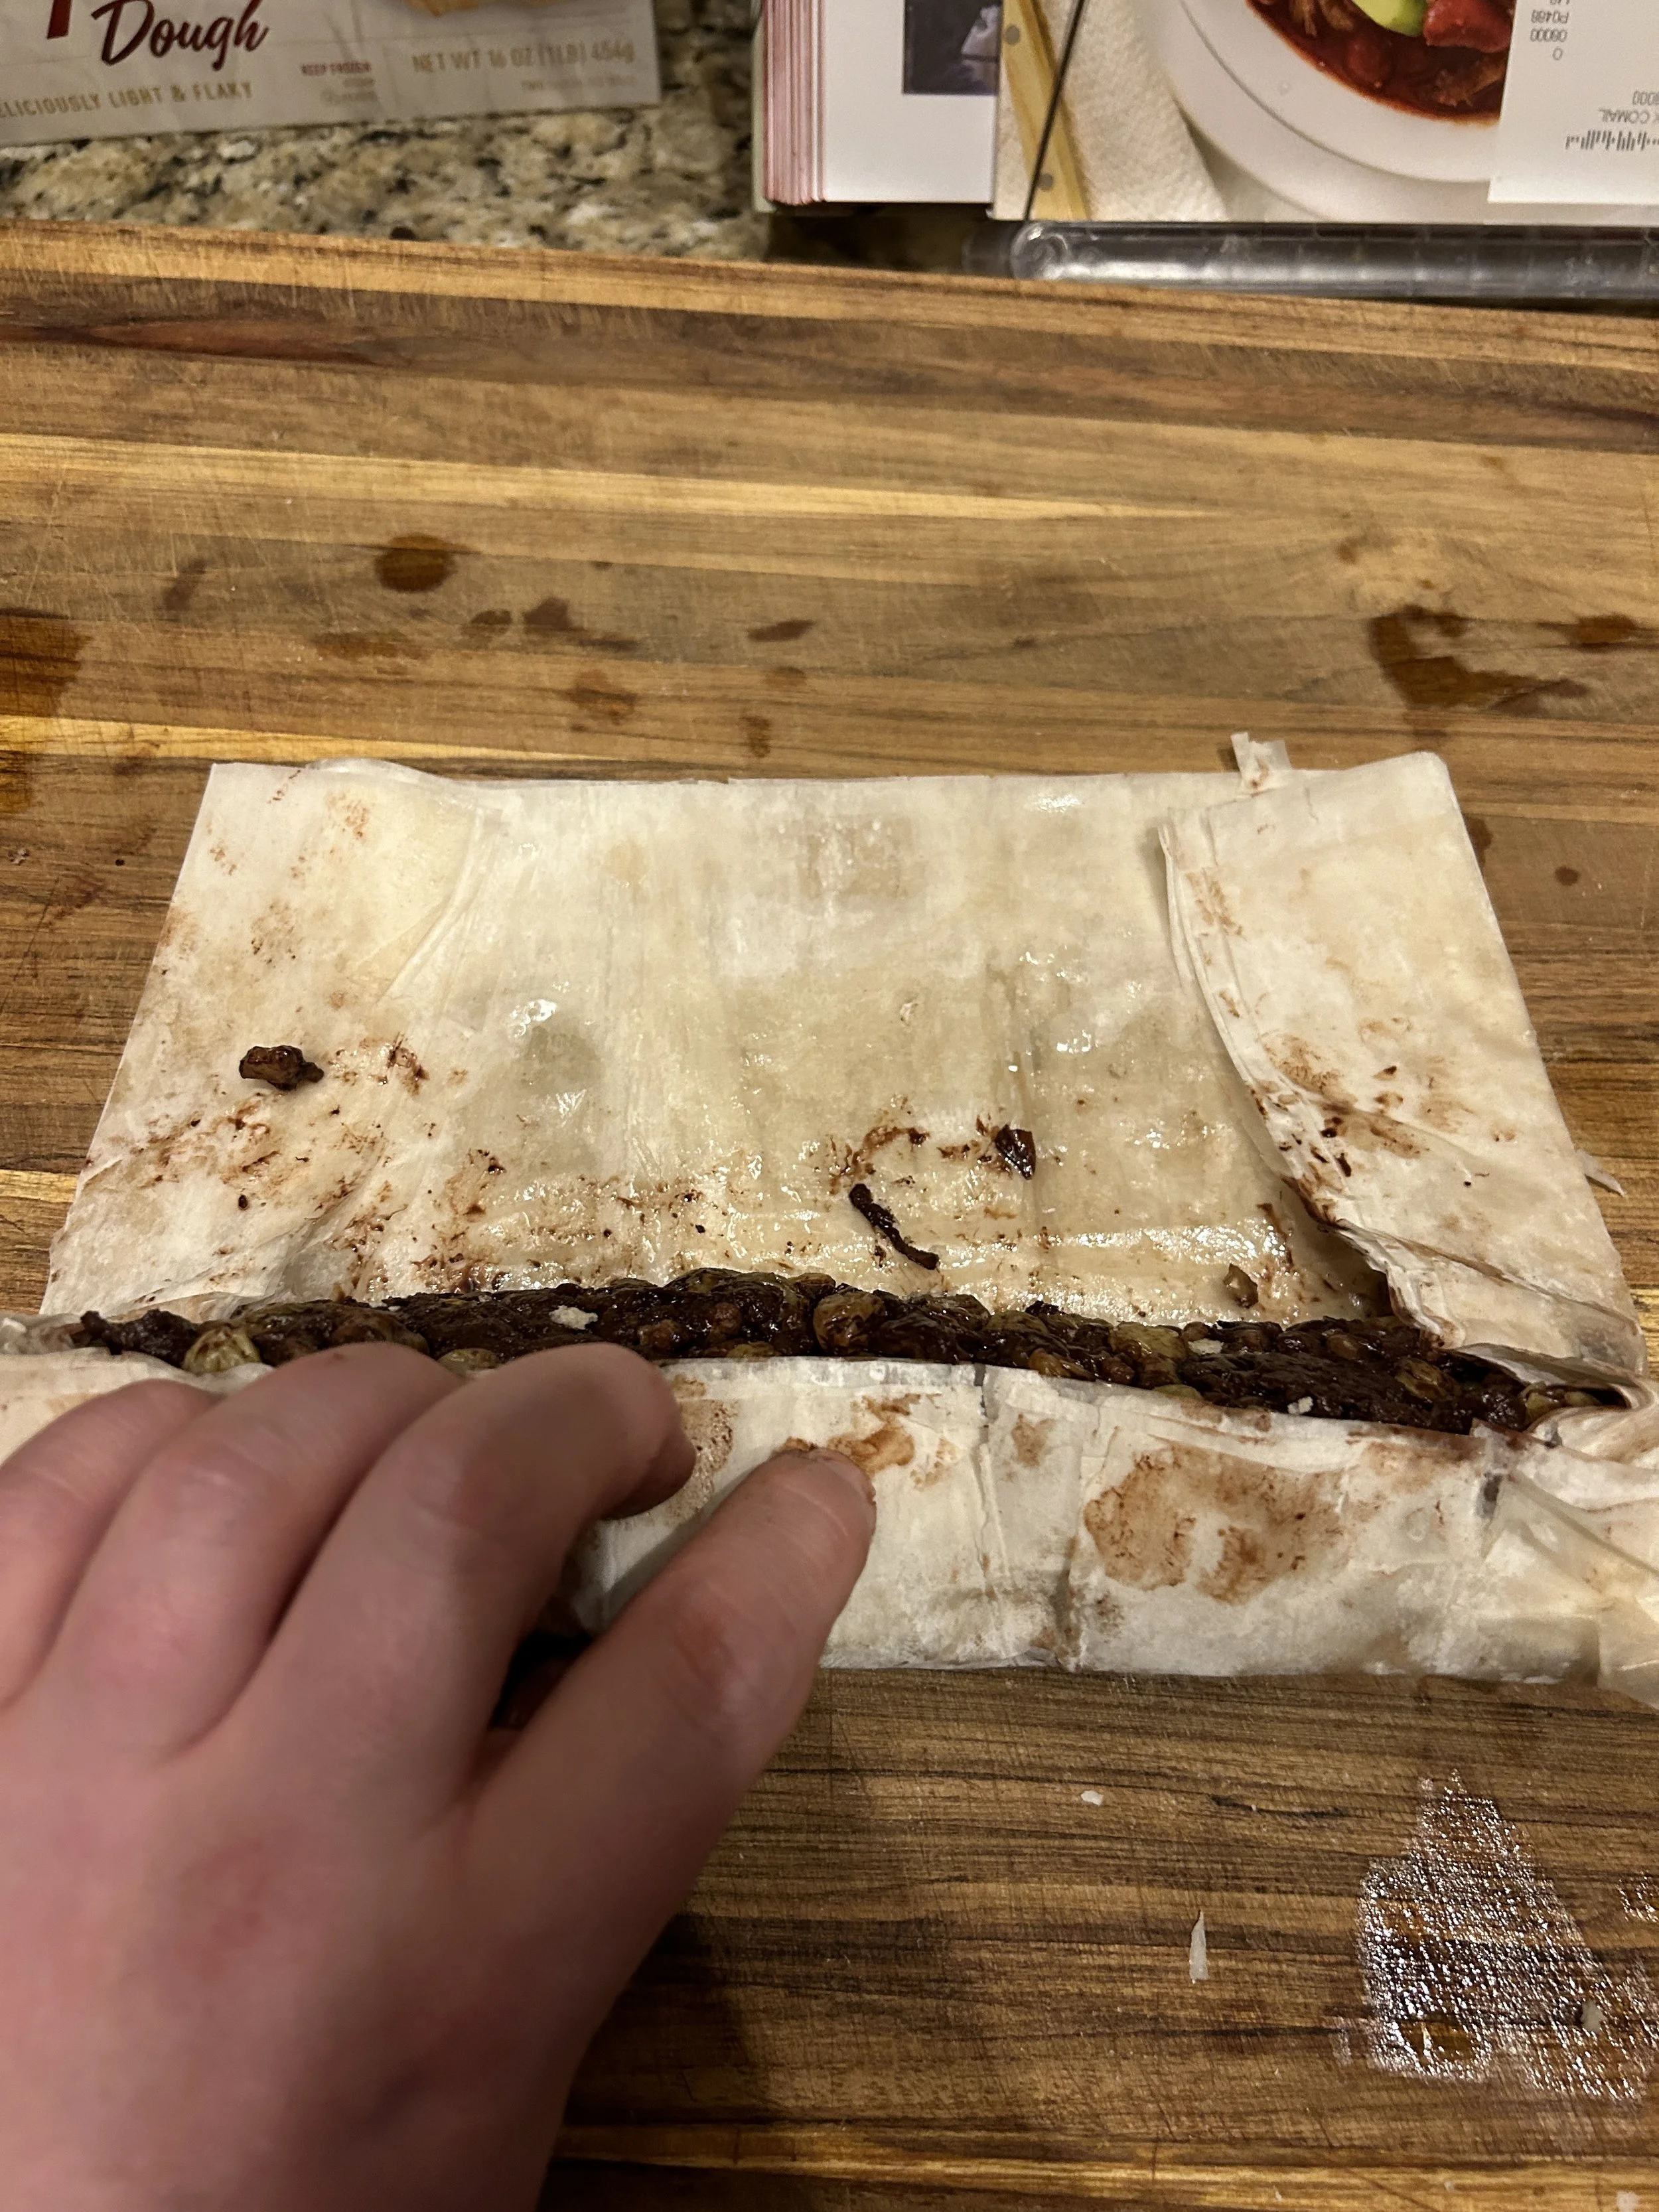
Sprinkle half of the breadcrumbs onto the pastry, then make a log of your filling along the edge of the pastry closest to you, leaving a 1 inch border on both ends. Like rolling a burrito, carefully fold the edges of the pastry over the filling, then roll the pastry over the filling tightly to get a smooth log, being careful as you don’t want the pastry to tear.
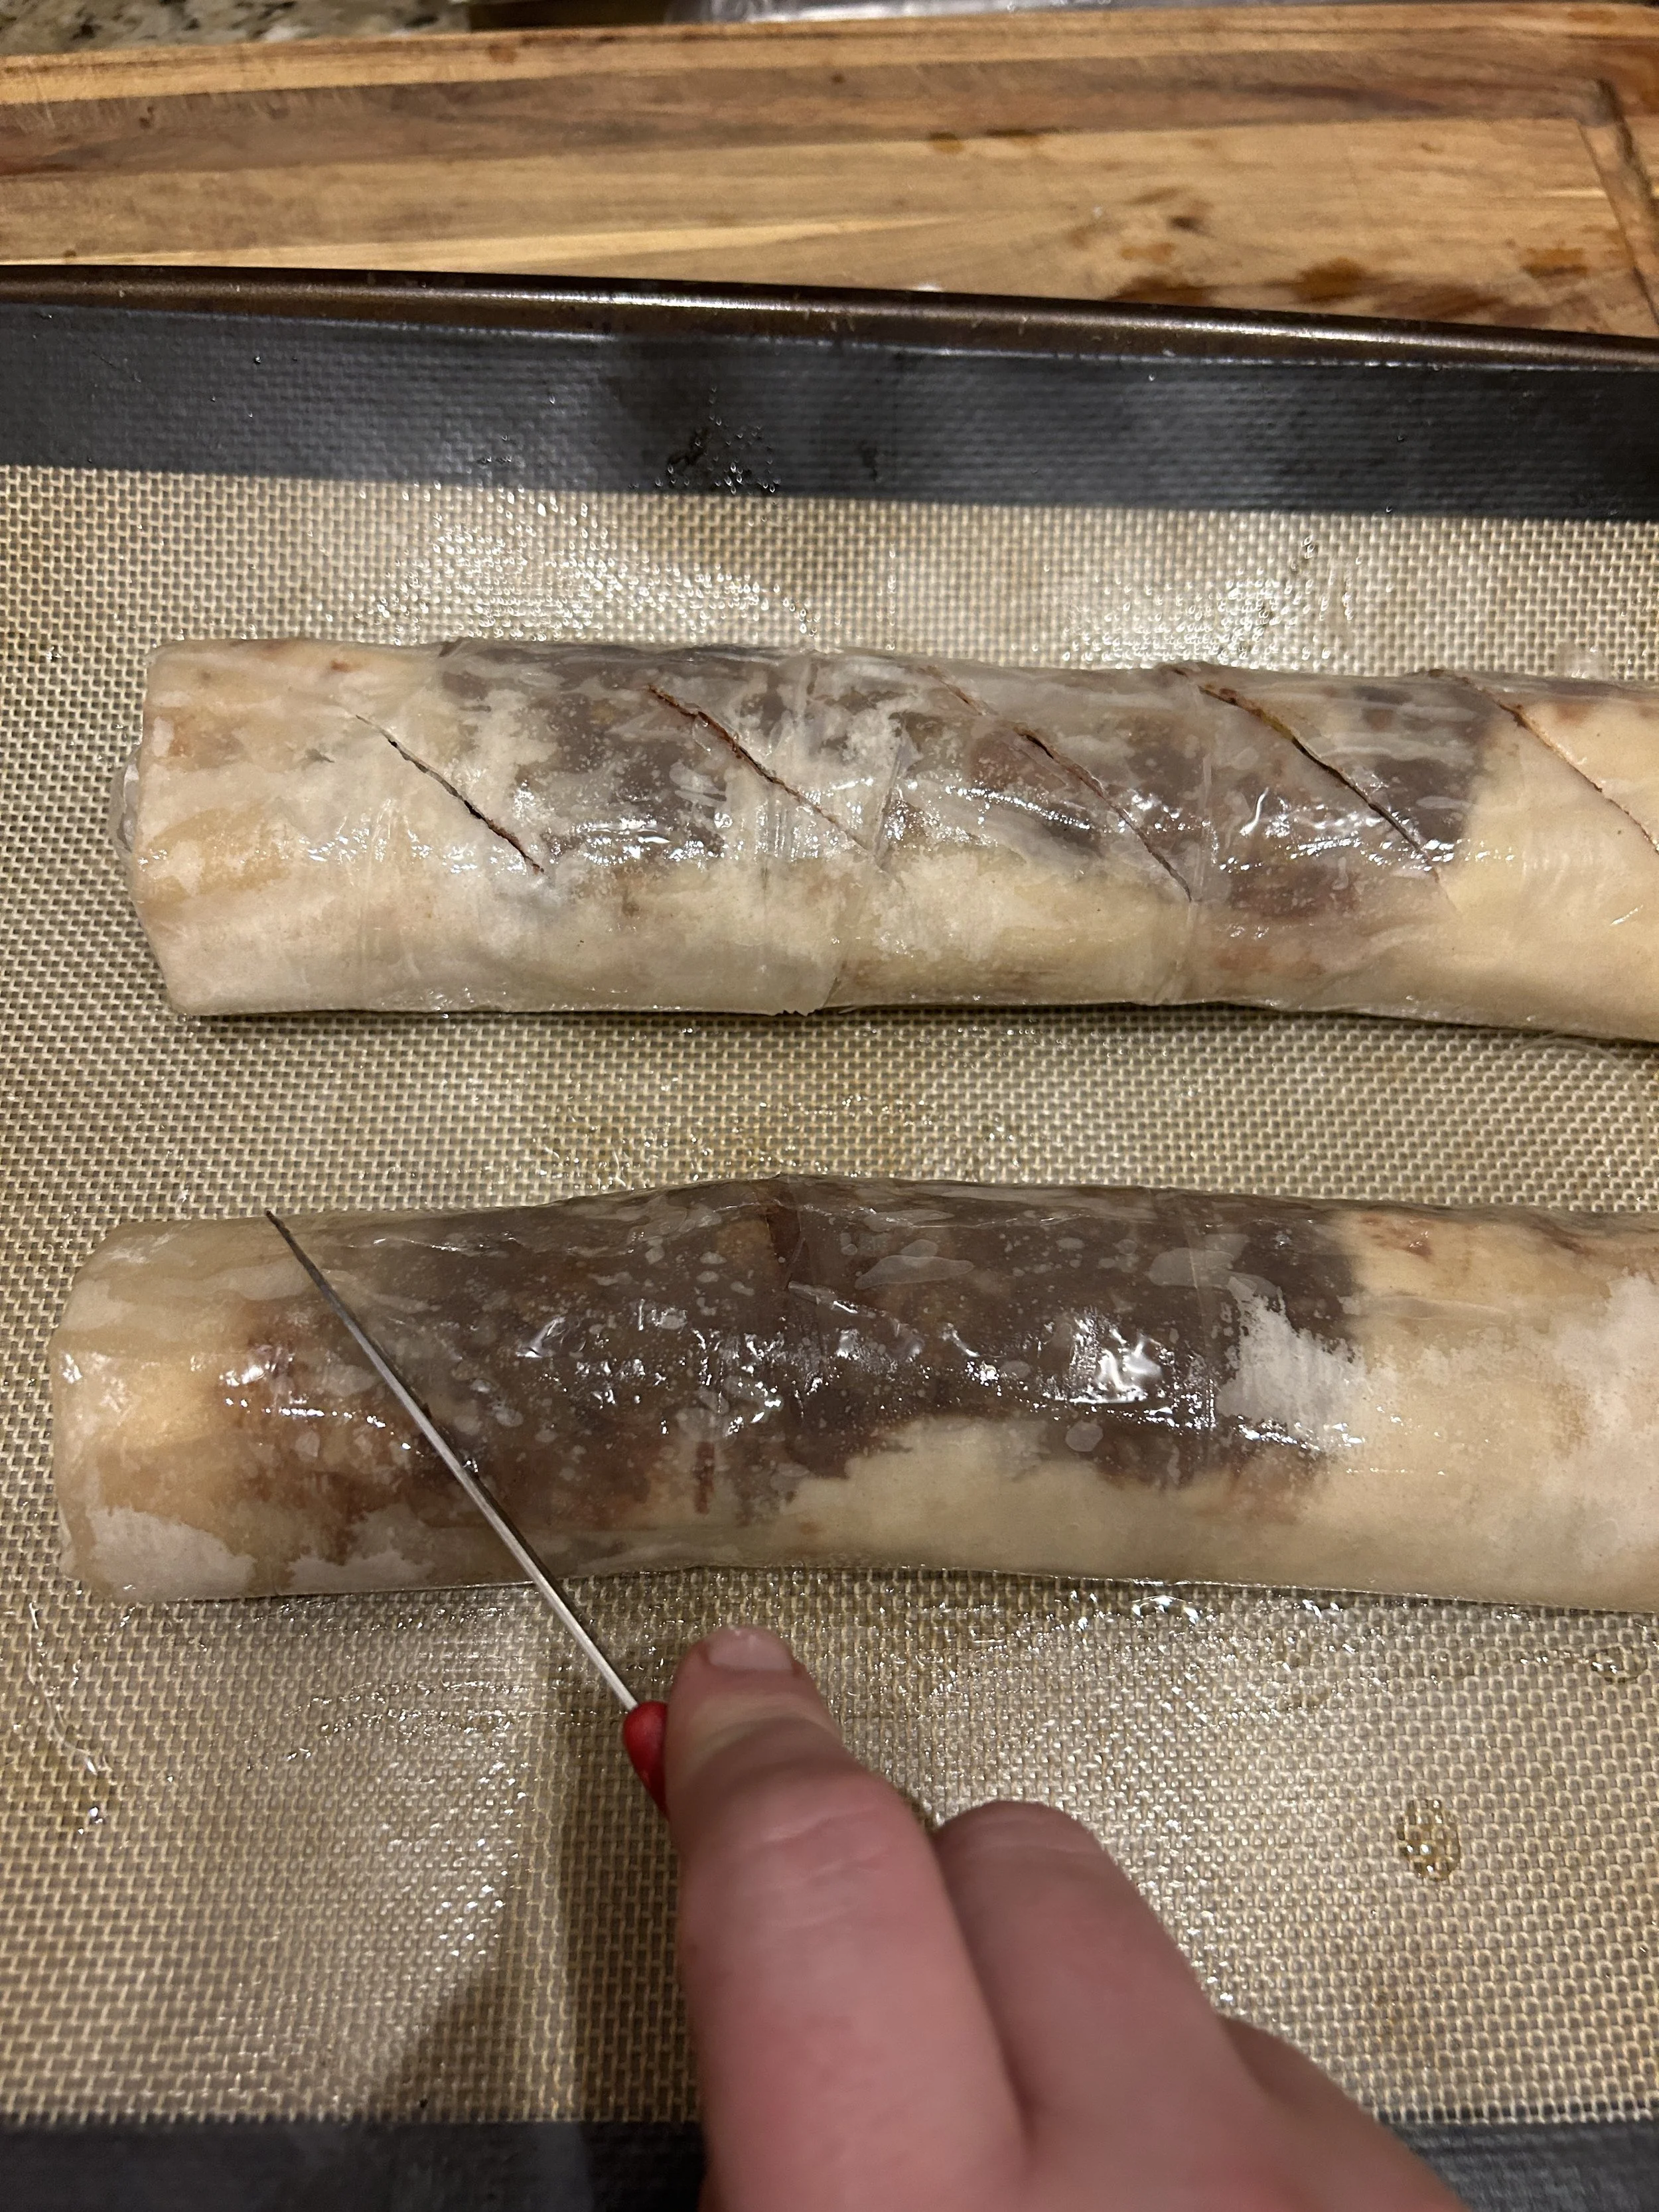
Lay the log onto the prepared baking sheet, seam-side down, then repeat with the remaining pastry, breadcrumbs, and filling. (Expecting company over for breakfast or brunch? Then you can make the strudel up to this point, wrap it, leave it in the fridge overnight, then bake it the next morning so it’s nice and warm for your guests.)
Once the oven is hot, brush the pastry with oil and use a sharp paring knife to cut 4-5 diagonal slits on top of the pastry. Bake for about 30 minutes, or until the pastry is golden all around, then let it cool before slicing and serving.

Honestly, I see no reason why you shouldn’t make this strudel as soon as humanly possible. That crisp, flaky pastry encases that wonderful, flavorful filling loaded with flavors of cocoa, apple, and a bit of citrus, plus some added texture from the nuts and raisins.
